Active Tool
Image-Pro with 3D Module only
The tools in the Active Tool group allow you to obtain distance, angle, and other line-related measurements by tracing features on the Iso-surfaces of 3D objects in your image. For example, you can use the line tool to trace a straight line between two points on an Iso-surface in your image, or you can use the angle tool to trace an angle formed by one or more Iso-surfaces in your image.
Select: The Select tool is used to select previously-drawn measurements on the image in order to move, edit, or delete them. To select more than one measurement, hold down the <CTRL> key while clicking them. You may also select multiple measurements by clicking-and-dragging a rectangle around them. To select all measurements in the active image, you can simply type <CTRL>+A.
Points: This tool allows you to mark a point of interest on the Iso-surface of a 3D object in your image. It returns the voxel location of the point in the volume. To add a point: In View mode, rotate the image so that the Iso-surface of the 3D object on which you want to place the point is ideally positioned to show the point of interest; zoom the image if necessary. Switch to Select mode, position the mouse over the point of interest on the 3D object, and click.
Line: This tool allows you to measure the distance between two points of interest on the Iso-surface of a 3D object in your image. It measures the straight-line shortest distance between the two points. See "Add Curve" below to learn how to draw a line that conforms to the shape of the Iso-surface between the two points of interest.
To add a line: In View mode, rotate the image so that the Iso-surface of the 3D object on which you want to place the two points is ideally positioned to show the points of interest; zoom the image if necessary. Switch to Select mode, position the mouse over the first point of interest on the 3D object, and click. Then position the mouse over the second point of interest and click. Image-Pro adds a straight line connecting the points (shown in green below).
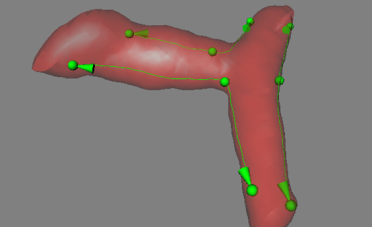
Polyline: This tool allows you to trace a polyvertices line on the Iso-surface of 3D objects. It measures the straight-line shortest distance from point to point. See "Add Curve" below to learn how to draw a line that conforms to the shape of the Iso-surface between the two points of interest.
To trace a polyvertices line: In View mode, rotate the image so that the Iso-surface of the 3D object on which you want to place the points of the polyvertices line is ideally positioned to show the points of interest; zoom the image if necessary. Switch to Select mode, position the mouse over the first point of interest on the 3D object, and click. Then position the mouse over the second point of interest and click. Do the same for as many points as needed to draw the polyvertices line; double-click the mouse to mark the last point of the line. Image-Pro draws straight lines connecting the various points (shown in green below).
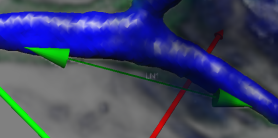
Angle: This tool allows you to measure an angle at the vertex of three points of interest on the Iso-surface of a 3D object in your image. To trace an angle: In View mode, rotate the image so that the Iso-surface of the 3D object on which you want to place the three points is ideally positioned to show the points of interest; zoom the image if necessary. Switch to Select mode, and click on the three points of interest. Image-Pro draws straight lines connecting the three points (shown in green below); the size of the angle is returned in the Data Table.
Add Curve: Use this tool to trace along an object surface. It creates a poly-line feature that connects 2 points going along the surface in the plane that passes through the selected two points and the camera position.
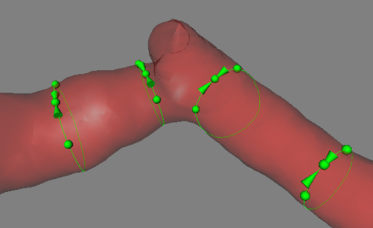
Add Outline: Use this tool to trace a closed 3-D polyline feature. It creates a closed poly-line feature that is an outline of a plane crossing an object. To add an outline, click at two separate locations on the imaginary line along which you want to create the outline of the object. The outline plane passes through the selected two points and through the position of viewing camera, so the outline is always created in the plane perpendicular to the screen plane.
Split Object: To split a 3D object into 2 objects, click at two locations on the imaginary splitting line of the object. The splitting plane passes through the selected two points and through the position of viewing camera, so the object is always split with a plane perpendicular to the screen plane.